Showing posts with label recipe. Show all posts

Thursday

Teaching An Old Dog New Bread Tricks

I've been making bread for 40 years, but it wasn't until this month that I dared to venture into sourdough territory.

Wow! Am I ever glad I did.

Here is a photo of a couple of ficelles I made this morning:


A ficelle is a skinny baguette. These are about 2 inches across. It's my favourite format for sandwiches. Ham and swiss cheese with sweet butter and dijon mustard. Or prosciutto or serrano ham with or without swiss cheese, and sweet butter, hold the mustard. Salami, when I can find a good one.

The Recipe?

Last week, I made a sourdough starter using this recipe:


Then I made a couple of loaves of "Norwich Sourdough Bread" using this recipe from the Wild Yeast Blog.

I halved the recipe, but otherwise I followed it to the letter and - what a surprise! - this was the best bread I have ever made! I should say "the best non-multigrain bread", because as a daily bread I am extremely fond of the multigrain sandwich loaves that I have been making for several years now. Once a month, I bake four of them and freeze them. Each loaf lasts me one week.

This Norwich Sourdough Bread has all the qualities I was looking for: it's not so wet that you can't handle it, it bakes up light, with some nice holes,

Cross-section of ficelle I made today.

the crust is crunchy but not too thick, and the aroma… ah the aroma! And the flavour… just sour enough… divine!

Another advantage of this recipe is that if you have some sourdough starter ready to use, you can start the bread in the morning and eat it for lunch - about six hours later. I have found very few breads able to develop that kind of flavour and texture without a cold fermentation, but this one did.

Still, sometimes I want to start my bread in the evening, and so yesterday I did all the steps up to and including the two folds, then I slipped the bowl into a plastic bag and put it in the fridge.

This morning, the dough had risen somewhat, and in fact it looked just like it did last week at the same stage.

I left it on the kitchen counter for an hour, and then I proceeded with the recipe.

Success! the resulting flavour and texture were the same as last week.

So if you've been putting off trying sourdough, don't wait 40 years! Try these recipes today.


P.S. If you have been subscribing to this blog, this may be the last post you ever receive! Google has been reminding me that I have to renew the domain on November 26, but the instructions they are sending me for doing so are not working. I am hoping that they will rectify the situation, but if not, I want to thank you for your interest. I have registered a new domain: www.cookscornerblog.com (very similar, but without all the hyphens) and may start posting at that URL if necessary.


Sunday

A Sweet Cheese To Make At Home: Ricotta


When I lived on my ranchito in Mexico, if I had to go to town (Dolores Hidalgo) I would try to get there early enough to find the ricotta man on his corner, selling his fresh ricotta of the day. It was so delicious, and so cheap! Considering that traditional Italian ricotta (which means "twice cooked") is made from the whey leftover from making other cheeses I can't believe how expensive it is at the supermarket. And the stuff they sell in this village is quite disgusting.

This old man's ricotta tasted just like the stuff I used to buy in Montreal, which has a large Italian community.

Many Mexicans make their own queso fresco -- the fresh white cheese they crumble over many dishes, and a few people make their own Oaxaca cheese too -- a stringy mozzarella-like cheese that melts beautifully. But not everyone makes ricotta with the whey. Maybe my ricotta man had Italian blood!

I threw an ice cream party last week, and had a quart of whole milk leftover, plus about half a cup of rich soy milk that I had extracted for making silken tofu, and I happened to have some citric acid in the pantry, so I decided to make ricotta cheese using the recipe in Ricki Carroll's Home Cheesemaking. (Actually, the recipe she gives here is a better one, and I will follow it next time. And by the way that's what's wrong with the book: I think it was published before they had all the recipes tested thoroughly, and I keep finding totally revised versions of them on their website.)

Ricotta is a very pleasant, sweet, small-curd cheese, and the homemade kind is better than most brands you can find at the supermarket, though not as good as the bulk ricotta found at real Italian stores.


After heating the milk and watching the curds form, the latter are ladled into a double layer of butter cloth (or several layers of cheesecloth), and hung up to drain.

This is the same contraption that I use for making jelly, no need for special equipment, just a stick and a way of suspending the ball of curds.

Here is the finished cheese, with 3 cups of whey which I will freeze to use in my next batch of bread.

The yield from one quart of milk was exactly half a pound (227 grams), which brings the cost to about $6 a lb, cheaper and a heck of a lot healthier than the supposedly healthy gourmet PC Blue Menu "Ricotta Whey Cheese" whose list of ingredients is quite a bit longer.


If I can resist the temptation of eating it as dessert, I plan to put it in some lasagna or use it for stuffing ravioli, some time this week. 


On the other hand, it's so quick and easy to make -- less than one hour from start to finish -- I should start stocking whole milk just so I can make the occasional batch, as an additional menu option.

In addition to lasagna and ravioli, ricotta is the cheese of choice for all sorts of Italian specialties. I remember very fondly a ricotta pie that we used to serve in my first restaurant, way back when. It was topped with pine nuts. Here's a very similar recipe, from Lidia's Italy.


Wednesday

"Tourtière" -- The Meat Pie From Quebec

Where I come from, each family has its own tourtière recipe, but my mother never passed her recipe on so I've had to experiment to find the one that corresponded to both my memories and my grown-up tastes.

At one point, I tried the Galloping Gourmet's* recipe. He substituted mashed potatoes for the breadcrumbs. Sounded like a good idea but you had to pick really starchy potatoes or you'd get a watery pie.


Finally, I adapted Jehane Benoit's recipe from her little-known The Canadiana Cookbook. It was published in 1970 and I opened my first restaurant in London, Ontario -- Auberge du Petit Prince -- in June 1972 and tourtière was an instant success there.

Fifteen years later, I opened a French restaurant in San Miguel de Allende, Mexico, and my tourtière was a hit there too. I attribute this to the fact that Mexicans love pork and that my recipe includes cinnamon, which is a favourite spice in Mexico, though as far as I know they don't use it in savoury dishes. On the other hand, maybe they just like good food!

The Pork Filling

For each pie:
1 lb ground pork (I buy shoulder and grind it myself)
1 small onion, finely chopped
2 ribs celery, with leaves if possible, finely chopped
1 small garlic clove, minced
1/2 tsp salt
1/2 tsp summer savoury
1/4 tsp ground cinnamon
1/4 tsp ground cloves
1/2 cup water
1/4 to 1/2 cup breadcrumbs
Egg wash (1 egg, beaten with a teaspoon of water or milk)

Place all ingredients except the breadcrumbs in a saucepan. Bring to a boil and cook, uncovered, for 20 minutes, over medium heat.
Remove from heat and add a few spoonfuls of breadcrumbs.
Let stand for 10 minutes. If the fat is sufficiently absorbed by the breadcrumbs, do not add more. If not, continue adding breadcrumbs.
Cool and pour into a pastry-lined pan. Cover with top crust that has vent holes to allow steam to escape. 
Brush with egg wash.
Bake at 400 F (200 C) until golden brown. Serve hot, with red or green tomato chow chow (recipe below).

Cooked tourtières can be frozen 4-5 months, and reheated without thawing.

The Special Dough

For the crust, I remember being fascinated by the Galloping Gourmet's hot water pie crust, and I found the recipe in The Canadiana Cookbook too.

How could this weird recipe work when we are constantly reminded to handle the dough as little as possible? The secret is the combination of baking powder, vinegar and egg, which creates the flakiest, tenderest pie crust imaginable. It uses pork lard as a fat, and that is essential.

That became my crust of choice for all savoury pies.

4-1/2 to 5 cups all-purpose flour (increase by 1/2 cup if using cake and pastry flour)
4 tsp baking powder
2 tsp salt
1 lb pure lard
1 cup hot water
4 tsp lemon juice or vinegar
1 egg, well beaten

Combine flour, baking powder and salt in a large mixing bowl.
Measure 1-1/3 cups of the lard and cut into the flour until mealy.
Dissolve the remaining lard completely in the hot water.
Add the lemon juice or vinegar and the egg.
Mix these liquids into the flour mixture until dough leaves the sides of the bowl.
Turn on lightly floured board and knead about 1 minute or until all the flour is blended. (Really, you need to do this!)
Divide into 4 to 6 balls, flatten them and wrap them in plastic film, then refrigerate at least one hour, and up to 12 hours.

You will find this dough incredibly easy to roll.

The Chow Chow

For a long time I used my mother's recipe for a quick fruit ketchup. It contained 1 can of peaches, 1 can of pears, and probably 1 can of tomatoes. To this you added onions, celery, vinegar, sugar and pickling spice. The advantage was you could make it all year, unlike our grandmothers who would preserve dozens of bottles of the stuff in season, to last all year.

Now I just buy it at the store and it's pretty good (look for the Habitant brand) but here is my recipe for the real thing, translated from Les Conserves, by Soeur Berthe (Editions de l'Homme, 1974):

TOMATO AND FRUIT CATSUP

18 ripe tomatoes
6 apples
5 peaches
5 pears
2 large onions
3 stalks celery
2 tsp coarse salt
2 TB pickling spice
1 cup white vinegar
1 1/2 cups sugar

Peel tomatoes and peaches by blanching them in hot water and cooling them quickly in cold water, then chop them - not too fine.
Peel apples and pears and cut into cubes.
Slice onions thinly.
Chop the celery.
Put all the above into a large, non-reactive pot.
Add vinegar, salt and spices (wrapped in cheesecloth).
Bring to the boil and simmer one hour.
Add the sugar and continue cooking until sugar is dissolved and right consistency has been reached.
Remove the spices and pour into sterilized jars, following your preferred canning method.

GREEN TOMATO CHOW CHOW

Here is the recipe that appears in The Canadiana Cookbook, in the chapter on New Brunswick. I have not tested it:

1/2 peck green tomatoes
6 large onions
6 medium cucumbers
1 head celery
4 sour apples
2 red peppers
3 lbs brown sugar
3 TB pickling spices tied in a bag
Cider vinegar

Cut tomatoes fine. 
Add 1/2 cup salt and leave overnight. 
Next morning, drain and add other ingredients. 
Nearly cover with vinegar (about one quart). 
Boil gently 1 to 1-1/2 hours. 
Pour in sterilized jars and seal.


* Graham Kerr used that name for his TV cooking show in the 60s.


Tuesday

Vietnamese Spring Rolls

I've been making these spring rolls lately, and these are the best instructions I have found.

I add julienned carrots and some of my homemade mung bean sprouts, for extra flavour and crunch.
Sometimes I use chicken or marinated tofu instead of the pork.
 The peanut sauce is delicious, I'm sure, but it's too fattening for me, so instead I make this other vietnamese sauce:

SWEET, SOUR & SPICY FISH SAUCE

1/4 up fish sauce
1/4 cup hot wter
2 TB sugar
1 lime, juiced
1 tsp garlic, minced
1 tsp red chili paste (I use Chinese hot chili/black bean paste?
2 TB grated carrots (optional)
2 TB grated daikon radish (if available - I omit them)
Combine all ingredients in a jar and shake.
Keeps in the fridge for a long time.

Saturday

In Search of the Perfect Microwave Egg

An Experiment in Coddled Egg Microwave Cookery 

Egg Coddler
I stopped having coddled eggs for breakfast when the ring on my Royal Worcester porcelain egg coddler broke off.*

Then I moved and now I can't find it, but it looked exactly like this one.

(What is a coddled egg? Imagine if you could inject some butter and other seasonings inside the shell of your egg, then soft-boil it to your exact taste... well, the egg coddler is just a replacement shell, and so to coddle an egg, you place it and your chosen seasonings inside the porcelain coddler, close it tightly, then submerge it in simmering water until it's just the way you like it.  A little miracle! [The ring is so you can grab it.])

I've cooked hard-boiled eggs in the microwave, but, I thought, why not coddled eggs? This morning, I decided to try.


Day 1

Chinese tea bowls make perfect little individual egg coddlers. I added a ruler so you can see how tiny they are -- they hold 1/2 cup when full. (If I were making two eggs, I would use one of my small glass custard cups.)


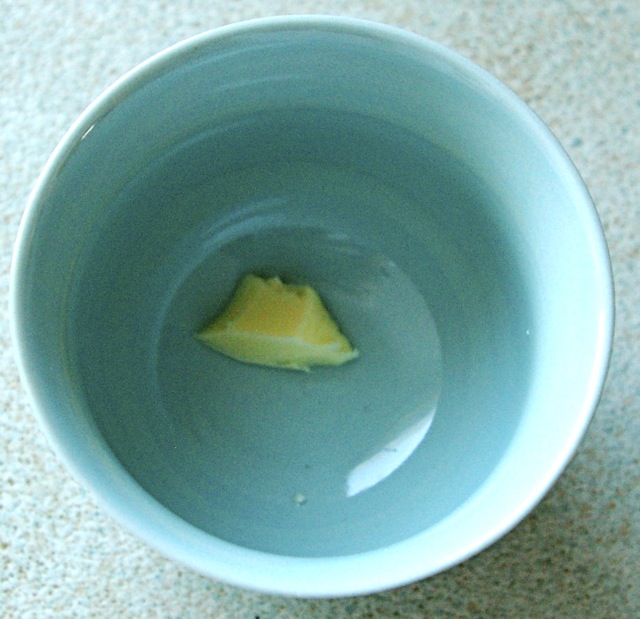
Put a tiny dab of butter in the bottom of the cup;

Microwave for 10-15 seconds to melt the butter;

Rotate the cup to coat the bottom and sides of the cup with butter (this is important both for the flavour and to keep the egg from sticking to the bowl);


Add the egg and pierce the yolk with the tip of a knife or a fork;

NOTE: this is essential -- otherwise the yolk will explode!


Add seasonings -- any or all of the following:
  • Salt and pepper;
  • Chopped chives or green onion tops;
  • Finely chopped cooked mushrooms, crumbled bacon or finely chopped ham;
  • Anything you would normally add to your eggs.
Add another dab of butter on top -- please don't skip this! It's amazing what this minuscule amount of butter does to the flavour of the egg!

Wrap the bowl in a paper towel (NOT plastic wrap);


Microwave on High-- I tried 45 seconds today;


Eat out of the bowl with a coffee spoon;

OR


Flip over toast.


This is how I did it today, but as you may know, after you take something out of the microwave oven it continues to cook. That's why, in these last two photos, you can see that the yolk is beginning to solidify.

I like my yolks completely liquid, so tomorrow, I will try 40 seconds and a 10-second rest, and see what happens.

NOTE: if you decide to try this, you will have to experiment too, because as you know all microwaves are different, and of course you may like your eggs more or less cooked.


Conclusion

After several tries, I did settle on 40 seconds, and that time seems to work best in the smaller of the two cups, the one on the right. The walls are thicker, which may contribute to the whites setting better.

That's what works best for my taste and my equipment.

You're on your own: do your own tests; just remember that, oddly enough, if you get some water in the bottom of the cup, it's not from under-cooking, but from over-cooking. It's a chemical reaction, apparently.


 * Without some sort of "handle", it's impossible to get the coddler out quickly when the timer goes off (and believe me, I've tried).

Thursday

Making Seedless Raspberry Jam In Winter

Seedless Raspberry Ja

Photo Credit: See Footnote
Raspberry jam is my absolute favourite, but I don't like the way those little seeds get between the teeth, so I've been straining them out.

During the raspberry season, I use the wild raspberries that grow in my back yard, but in winter, I use frozen raspberries, and this is the recipe that I use.

This jam is as pure as it gets.* I never use pectin – it's expensive and superfluous and jams made with it do not have the same rich fruit taste and texture.

EQUIPMENT REQUIRED
  • A stainless steel pot or saucepan
  • A kitchen scale (This recipe shows the weights, both in ounces and in grams -- next time I make it I will measure the raspberries by volume and I will come back and fill in the square.)
  • A candy thermometer (See other technique, below.)
  • A potato or bean masher
  • A fine strainer and a glass or stainless steel bowl over which it sits well (and safely, jam is hot!)
  • A jam funnel (optional)
  • A small jar

INGREDIENTS Quantity
Metric Weight
Quantity
US Weight
Quantity
Volume
Frozen raspberries 285 grams 10 ounces ?
White sugar 240 grams 8.5 ounces 1 cup
(rounded)


PREPARATION
  1. Mash the raspberries if they're thawed; if not, combine them directly with the sugar
  2. Set aside, stirring from time to time, until all the sugar is dissolved
  3. Transfer to stainless steel pot
  4. Place over medium heat and continue to mash the raspberries until there are no whole ones left
  5. Insert the candy thermometer
  6. Boil, stirring from time to time at the beginning, then let the mixture simmer until the thermometer reaches 104 degrees C or 220 F (this is called the Jelly stage and if you don't have a thermometer [highly recommended if you're going to be making your own jams and jellies], follow my friend Goldie's technique: she would keep a small saucer in the freezer, take it out and pour a spoonful of jam on it, then run her finger through the jam. If it wrinkled, the jam was ready.)
  7. Remove from heat, stir well and pour carefully into the strainer, using a silicone spatula to get every bit. This must be done while the jam is still hot, so do be careful.
  8. Now comes the fun! Stir the jam around with a spoon; press on the seeds and keep scraping the bottom of the strainer until nothing will come through any more. (But don't throw those seeds away yet!**)
  9. Transfer quickly to a jar, using a jam funnel if you have one
  10. Cool, put the lid on and refrigerate
YIELD:  1 cup (250 ml)  -- just enough to fill one of those cute Mason-type jelly jars.

NOTE: I prefer to make a small quantity like this, rather than having to worry about sterilizing the jar etc. I buy the frozen raspberries in a big bag, and just take out what I need as I need it. But of course you can double the recipe.

* I found the following ingredients listed on a jar of premium "Pure Seedless Raspberry Jam" at the supermarket:
  • Raspberries
  • Sugar
  • Glucose
  • Pectin
  • Citric Acid
** There's still a lot of raspberry pulp (and sugar) attached to the seeds, and it makes great tea, either by itself or with some tea leaves. If you have a teapot that comes with a strainer basket, that's best; otherwise, use a tea strainer over your cup.  Try it!

 Image: zole4 / FreeDigitalPhotos.net

Tuesday

Back to Butter

Photo: New England Cheesemaking Supply Company
I never "left" it, so I didn't have to go back to butter, but I know a lot of people do when they start caring about what they put into their bodies, and once they find out what the new medical studies show about the relationship between what they eat and the cholesterol in their arteries -- or rather, the lack of such a relationship.

If you're a healthy person and you like butter, then eat butter, not butter-flavoured margarine, for heaven's sake! (I once read an interview with Dr. Andrew Weil, where he talked about eating everything [I remember something about pizza for breakfast]. The interviewer asked him if there was anything at all he would never eat, and the answer was "margarine". It had to do with the way they process and refine the oils that are used to make margarine.)

Now somebody's making margarine with virgin olive oil -- a whole 12% of the product is olive oil -- guess what the other 88% is?

I wrote about making homemade butter a while back, and included my own recipe for plain butter and for cultured butter.

However, I don't make my own butter any more because Lactantia brand unsalted cultured butter, made in Quebec, is now available locally, and in addition to being cheaper than homemade butter, there's the nostalgia factor. Quebec is my home, and Lactantia butter is the brand I was raised on.

My own recipe included some yogurt culture, but this morning I got the monthly newsletter from New England Cheesemaking Company, where I get my yogurt culture and other cheesemaking ingredients, and it had a recipe for cultured butter made with buttermilk culture. 


Here is the link to the New England Cheesemaking Company recipe for cultured butter.

What's nice about that recipe is that it is fully illustrated, and the method is exactly the one I used, so whether you use their recipe or mine, you now have a great set of instructions, and you just can't go wrong.

Happy buttermaking!


Wednesday

Shaggy Mane Mushroom Recipe

Shaggy Mane Mushrooms at Different Stages, in the Early Morning Light
I attended a mushroom hunt a few weeks ago, and I came away without mushrooms, but with a shaggy mane mushroom recipe.

The hunt took place in the woods, and the shaggy mane (coprinus comatus) grows in open fields, so it was not included in that day's activities, but I asked the mycologist to tell me how to deal with the abundance of shaggy manes that pop up in my village every October. I had tried cooking them, but I didn't like the way they came out, all black and yucky. (It won't surprise you to hear that they're often referred to as "inky caps".)

The secret?
  1. Pick them as young as possible -- before they start turning black;
  2. Cut them in two lengthwise;
  3. Freeze them on a cookie sheet;
  4. Bag them and store them in the freezer;
  5. Take out as many as you need and sauté them.
OR
  • Cut them in two and sauté them fresh.

WARNING: shaggy manes and alcohol are a toxic combination.

French Onion Soup Weather

January is French onion soup weather.

I had some homemade beef stock on hand and lots of onions, and it was winter... all perfect conditions for concocting a batch of my famous onion soup. (I don't wish to brag but in my restaurants, we served what everybody called the best onion soup in the world.)

Onion soup is the easiest dish in the world, but unless you start with first-class ingredients, you may as well buy it in a can.

In fact, quality ingredients are so important that since there is no decent French bread available in my village, I had to start by making a batch of baguette -- no kidding.

Here's the recipe:
  • Lots of cooking onions - 1 large onion per portion
  • Olive oil and/or butter
  • Home-made brown beef stock (recipe here)
  • Home-made chicken stock, degreased
  • Brandy
  • Bay leaves
  • Salt and pepper
  • French baguette bread (recipe here)
  • Clarified butter (recipe here)
  • Swiss-type cheese like Emmenthaler or Jarlsberg
  • Real Parmesan cheese

Slice the baguette into 3/4-inch (2 cm) slices and dry them thoroughly in a 200-degree (100 C) oven. (You don't want to toast it, just dry it.)

Mix the beef and chicken stocks in a separate saucepan and heat them up; keep warm.

Peel onions, slice them in two lengthwise (from root to tip, to get two identical halves), and slice each half thinly along the length.

Heat some butter or a mixture of butter and oil in a large frying pan, add onions and stir and stir until they start to turn golden brown; then add a teaspoonful of sugar and continue frying and stirring until the onions are a deep golden brown. They must not burn. If you're making a lot of soup, do this in batches and transfer each batch to a bowl while you fry the next batch.

Combine all the onions back into the frying pan, sprinkle with a bit of flour and stir around until the flour has browned. Do this on medium heat so the flour doesn't burn. You just need a little bit of flour, just a tablespoon or two.

Pour a splash of brandy and a couple of ladles of stock over the onions, and stir to dissolve the flour and all the brown residue at the bottom of the pan.  Scrape this off well with a wooden spoon, then transfer the whole thing to your soup pot.

Add more beef and chicken stock -- there must be more liquid than onions, about 1/3 more.

Add a bit of salt and pepper, a few bay leaves, and simmer the soup on low heat for half an hour, just to meld the flavours, really, because the onions are already cooked.

The oven should be preheated to 450 F  (225 C) and the rack should be in the centre position.

Heat some clarified butter in a small pan and fry the bread slices on both sides until they are just a nice golden colour.

Taste the soup and adjust the seasoning if necessary.

Ladle the soup into individual ovenproof tureens (or one large one, as in the photo), cover the surface with slices of fried bread, sprinkle grated Swiss-type cheese (not too much, please! This isn't pizza.), and sprinkle a spoonful of real Parmesan if you have any.

Place the whole thing on a cookie sheet or pizza pan or whatever (to catch spills and make it safer to handle when it's ready).

Bake for about 10 minutes, or until the top is like the photo -- brown and bubbly and smelling like nothing else on earth.

Bon appétit!

TIPS & TRICKS
  •  VARIATION: This onion soup is very good all by itself, or with a light sprinkling of Parmesan cheese.
  • The reason I recommend slicing the onions as described above is that this way you get onion pieces in the soup. If you slice them across instead, the onions tend to dissolve and disappear.
  • The size of the pan, the amount of heat, the amount of fat and the amount of onions in each batch must be such that the onions start frying right away, without rendering their water.
  • There's no point in using a crock pot for this; the cooking time is too short.
  • Only white French-style bread has the right body and flavour for this soup. This is NOT the place for your healthy multigrain sourdough bread -- I know, because I've tried it.

    I made the bread too!

      Monday

      The Horse Mushroom Race: There's A New Competitor!


      Horse Mushrooms. Yes, the big one is over 6 inches wide!
      The friend with the property for sale called to say more horse mushrooms (agaricus arvensis) had sprung up in the lawn and I should go and get them.

      But when I got there, oh horrors, some thief had come and cut off all their heads, leaving all the stems.

      My first reaction was, how stupid, there's so much meat in those stalks. My second reaction was, OMG, I've got competition!

      I drove around to all my secret horse mushroom places, and the thief had done the same to most of them.

      I managed to rescue the ones in the picture above, including that huge specimen.

      I hope the thief doesn't like shaggy manes. They should be up soon.

      P. S. Mushroom recipes are in this post.

      Tuesday

      More Wild Mushrooms

      My best crop of wild mushrooms usually comes from the lawn of some friends who live about a 45-minute walk away, the perfect distance for a bit of exercise. I have their permission to pick any and all fungi from their property.

      Usually, it's horse mushrooms. My favorites. Tasty, easy to identify, and given the right weather conditions, apt to grow to a phenomenal size. 

      Like this.


      I had just heard that they were selling their property, so this morning I headed over there to see if the latest rain had produced a crop. And indeed it had.

      Fearful that some hired person might come and mow down my dinner, I picked all there was. Normally, I would have allowed them to grow a bit bigger. I'm greedy when it comes to horse mushrooms.


      This is what I got.

      Enough for a large, lovely frittata.

      I gave the recipe for preparing and cooking wild mushrooms in this earlier post.

      Wednesday

      Why Making Your Own French Baguette Is Empowering

      No, this baguette is not from the bakery!
      COOKING IS EMPOWERING because not knowing how to cook makes us dependent on Kraft and Lever Brothers and the other multinationals we allow to feed ourselves and our families.

      I remember how I felt the first time I made my own baguette. Is there anything that seems more impossible to achieve than a real French baguette? Yet all you have to do is follow the recipe, learn from the first few failures, and soon you're making all your own bread, including French baguette.

      I also remember the first time I tied my own roast. I was a successful restaurateur yet I depended on the butcher to tie my roasts for me. I would watch as he made a special knot that didn't require a helper to lend a finger to keep it from slipping.

      One day I said, "Show me how to do this," and he did, and from then on I was able to make all sorts of elegant packages for my customers. Empowering.

      (Curious about this butchers knot? Find out how to tie it here.)

      Anyway, you ought to try your hand at making your own baguette. The folks at King Arthur Flour have a real easy and fully illustrated recipe on their blog, Baking Banter.

      It's the recipe I used to make the loaf in these pictures, and if I may say so, mine turned out prettier than King Arthur's. (Talk about power!)

      An Economical Chocolate Mousse Recipe


      A READER from South Africa asks for an economical chocolate mousse recipe.

      It's hard to know which of the usual chocolate mousse ingredients are expensive in other countries: Is it butter? Cream? Chocolate? Sugar? Eggs? Vanilla?

      Is it the equipment?

      It just so happens that my favorite chocolate mousse recipe (which is different from the one in my chocolate mousse cake – though you could certainly use it there) calls for no cream and no butter, and that's just about as economical as you can get, at least on this continent.

      As far as equipment is concerned, if you don't have an electric mixer, a whisk will certainly do.

      And not only that, but it's absolutely delicious, and it's the one I served in all my restaurants, in little pots. In my San Miguel de Allende (Mexico) restaurant, we used to put a surprise in the bottom – a chocolate-covered coffee bean, maybe, or a mint chocolate candy, or just a small chunk of chocolate. We also played with different liqueurs. Both the liqueur and the surprise changed every week.

      Here is that chocolate mousse recipe:

      For 5 or 6 small pots

      4 or 5 very fresh eggs, at room temperature
      1/2 cup plus 1 TB sugar (40 g)
      6 squares (6 oz) semi-sweet or bittersweet chocolate (180 g)
      3 TB strong coffee OR liqueur* OR brandy (45 ml)
      1/2 tsp pure vanilla extract

      MELT chocolate in top of double boiler; add coffee or booze, stir, add vanilla. Don't stir too much. Set aside to cool to room temperature.

      SEPARATE the eggs, putting the yolks in the top of a double boiler or a bowl that fits over a pot with hot water in it. The whites go in a squeaky clean bowl, or in the mixer bowl, for whipping.

      ADD the 1/2 cup of sugar to the yolks and beat until light and fluffy. Put over water (the bottom must not touch the water and if the water is boiling, take the pot off the heat). Leave for 3 or 4 minutes, or until lukewarm right through and the sides of the bowl are sticky. (I remember that the latter detail was added by my cook, after she'd made the mousse for several years, as a clue for apprentices.)

      MOVE yolk-sugar mixture to an ice bath (a larger bowl with ice cubes and water in it), and stir until cool and thick.

      ADD chocolate mixture to yolk mixture, stir well. Make sure it's cool before proceeding with the next step.

      BEAT the egg whites until stiff, adding the 1 TB of sugar about halfway through.

      STIR 1/4 of the egg whites into the chocolate mixture to loosen it, then gradually fold in the rest of the egg whites with a spatula, in 5 or 6 batches.

      SPOON or pipe into individual pots or into one beautiful serving bowl.

      SERVE decorated with a dot of whipped cream, an edible flower, a sprig of mint, a dusting of icing sugar – or nothing at all.

      REFRIGERATE for at least 3 hours, and preferably overnight. 

      ENJOY the compliments!

      * Some of the liqueurs we have used include: coffee, orange, mint or chocolate; but a shot of very strong coffee works just as well.

      CLICK HERE FOR THE PRINTABLE VERSION (PDF)

      Tuesday

      Paupiettes de veau

      THERE IS NO RECIPE for paupiettes de veau in Julia Child's Mastering the Art of French Cooking, but if there were, it would probably be this recipe, by her partner-in-crime Simone Beck, which the latter published in her own 1972 cookbook, Simca's Cuisine.

      Right from the start, Simca's book became one of my favorites and I featured some of her recipes on my restaurants' menus. Her cooking is as delicate as the book's design and I'm sure that she's responsible for the light quality of many of the recipes in Mastering.

      I don't make paupiettes de veau very often: veal prices are out of sight and if I go to the trouble of flattening a slice of pork, I'd rather make my famous crunchy wiener schnitzel with it (my two secrets: 1) dip scallops in seasoned flour, then egg, then breadcrumbs; and 2) deep-fry in fresh vegetable oil).

      But here's Simone Beck's recipe for

      Paupiettes de veau ou de porc à la tourangelle*
      Recipe for Veal Paupiettes
      (Small rolls of veal or pork stuffed with onions and cheese, in cream sauce)

      For 6 (double the quantities for hearty appetites):

      About 1/3 cup vegetable or peanut oil (80 ml)
      About 5 medium-sized yellow onions (to make 2 cups, chopped)
      6 veal or pork scallops, about 3 x 5 inches (7.5 x 12.5 cm), to be rolled
      Salt
      Black pepper
      6 TB Dijon mustard
      1 TB fresh oregano, minced (or 1 tsp, dried)
      6 very thin slices imported Swiss cheese
      4 TB butter
      Bouquet garni of thyme, 1/2 bay leaf, oregano

      1. WARM 2 or 3 tablespoons of the oil in a heavy-bottomed ovenproof skillet with a lid (large enough so paupiettes can cook in a single layer).

      2. ADD the chopped onions, and cook them very gently, stirring occasionally, until they are tender and lightly colored (about 15 minutes). Remove them with a slotted spoon, set them aside, and season with salt and pepper. Do not clean the pan.

      3. FLATTEN the veal or pork scallops between pieces of waxed paper [or plastic] with a mallet, a heavy bottle, the side of a cleaver, or a rolling pin, to make them as thin as possible. Sprinkle them with salt and pepper.

      4. BRUSH each scallop with mustard and sprinkle lightly with oregano. Reserving 1 cup of onions for later, spread each scallop with a thin layer of onions and cover with a slice of cheese. Roll up the scallops into paupiettes and secure them with toothpicks or tie with string**. (It's easier to brown them if you use string.)

      5. PREHEAT the oven to 350 F (180).

      6. PUT THE paupiettes into the pan in which the onions were cooked, adding more oil if necessary, and brown them on all sides over moderate heat (about 15 minutes). Remove the meat to a plate and clean the skillet.

      7. MELT the butter in the skillet, and add the meat, the remaining onions, and the bouquet garni. Cover with a piece of waxed paper***, put the lid on the skillet, and set it in the preheated oven. Cook 35 to 40 minutes for veal; about 45 minutes to 1 hour for pork, according to the tenderness of the meat. The meat will be done when it is easily pierced with a sharp knife.

      Put the paupiettes on a warmed serving dish, discarding the strings or toothpicks. Spread the onions around the meat and keep the platter warm while making the sauce.

      Sauce

      2 TB flour
      1/4 to 1/3 cup heavy cream (60 to 120 ml)
      Juice of 1 medium-sized lemon, strained
      1 cup beef bouillon, fresh or canned (250 ml)
      Salt, freshly ground black pepper
      Chopped parsley

      1. PUT the flour in a small saucepan and gradually stir in the cream to make a smooth paste. Stir in the strained juice of the lemon and set aside.

      2. POUR the bouillon into the skillet in which the meat was cooked, and set over heat. Let boil half a minute, scraping the bottom to deglaze. Pour 4 or 5 TB of the bouillon into the flour mixture and mix well; then pour back into the skillet and simmer, stirring constantly, while the sauce thickens. Taste, and correct the seasoning.

      Serving

      Cover the paupiettes with the sauce and serve them sprinkled with chopped parsley.

      Variation

      Omit the mustard and replace the Swiss cheese with goat cheese.

      Paupiettes de veau in the slow cooker?

      Why bother? What takes a long time with paupiettes is the preparation and you can't skip that part, plus the sauce has to be made separately.

      Those lucky French women!

      If you were living in France, or even in Montreal or Québec City, you could stop by the butcher shop on your way home from work and pick up some nice pre-flattened and pre-trimmed scallops, along with some sausage meat ready to turn into stuffing, or you could buy pre-stuffed and tied paupiettes, ready to cook, or even some fully cooked and sauced paupiettes de veau, ready to reheat.

      Then you could go next door and pick up some fresh noodles and a nice salad, and by the time you'd had your apéritif and appetizer, dinner would be ready!


      * A la tourangelle means "from the Touraine", that beautiful region of France that is celebrated for its many châteaux.

      ** This is what they should look like after tying:


      *** Nowadays we'd use foil or parchment paper

      CLICK HERE FOR PRINTABLE VERSION (PDF)

      Saturday

      Chocolate Mousse Cake Recipe


      OF ALL THE LUSCIOUS DESSERTS that we served in my various restaurants, none was ever as beloved as this chocolate mousse cake. It got to the point where I had to have the recipe pre-printed to fill all the requests.

      It may look complicated, but all it is is an assemblage of chocolate meringue and chocolate mousse layers, decorated with broken up pieces of meringue and icing sugar.

      But oh! the taste and texture are so special: imagine the crunchiness and melt-in-the-mouthingness of meringue and the creamy richness of chocolate mousse, combined – a marriage arranged by the fairies, surely.

      EQUIPMENT: you'll need 2 large baking sheets, a large pastry bag (preferably two) and two decorating tips – a 1/2 inch and a 1/4 inch, some parchment paper and a piece of cardboard cut into a 10 by 5-1/2-inch oval (26 x 14 cm).

      MAKING THE CHOCOLATE MOUSSE CAKE
      10 portions

      Chocolate Meringue Layers

      5 egg whites
      5-1/2 oz (150 g) icing sugar (one cup, loosely packed)
      1-1/4 oz (35 g) plain cocoa powder (1/2 cup)
      5-1/2 oz (150 g) white sugar (1/2 cup + 1 TB)
      • PREHEAT the oven to 150 C (300 F)
      • SIFT the icing sugar and cocoa together.
      • WHIP the egg whites at high speed till firm, adding 2 TB of sugar halfway, to give them body.
      • ADD the rest of the sugar at low speed.
      • FOLD IN the icing sugar/cocoa mixture with a spatula, being careful not to deflate the meringue.
      • LINE two baking sheets with parchment paper; attach the paper to the baking sheets with a dot of meringue at each corner.
      • USING the cardboard template, draw 3 ovals on the paper.
      • FILL a large pastry bag fitted with the larger tip with meringue and pipe 3 ovals in a spiral pattern (as in the photo, above).
      • SWITCH to the smaller tip, and pipe all the remaining meringue into straight strips, making sure they don't touch each other.
      • BAKE the meringues for approximately 1 hour and 5 minutes. Start watching after 15 minutes of baking: the meringue must not brown. Switch the sheets around if necessary to even out the baking.
      • REMOVE the narrow strips as soon as they're done; the ovals will need about 10 minutes more. You can tell they're ready when they no longer stick to the paper. Check the bottom: it must not be sticky.
      • YOU CAN prepare the above several days in advance, but they must be stored in an air-tight container so they'll remain crisp.

      Chocolate Mousse Recipe

      6 oz (170 g) semi-sweet baking chocolate
      1/4 cup orange, coffee or mint liqueur (optional)
      3 oz (85 g) butter
      • MELT the chocolate in a double boiler with the optional liqueur; remove from heat and beat in the butter until the mixture is creamy.
      • SET aside to cool until it has reached room temperature. The mixture must not be tepid. (But do not refrigerate!)

      4 egg yolks
      • MIX IN the egg yolks.

      4 egg whites
      2 TB white sugar
      • BEAT the egg whites until firm, adding the sugar halfway.
      • STIR 1/3 of the egg whites into the cooled chocolate mixture to loosen it, then fold in the remaining whites delicately with a spatula. Avoid deflating the egg whites.
      OR you can use our recipe for ECONOMICAL CHOCOLATE MOUSSE. 

        Assembling the Cake
        • WORK quickly so the chocolate mousse doesn't start to liquefy;
        • DEPOSIT one of the chocolate meringue ovals on a clean cardboard oval;
        • SPREAD an even coat of chocolate mousse all over the meringue oval (use about 1/4 of the mousse);
        • PLACE a second chocolate meringue oval on top;
        • ADD another coat of chocolate mousse;
        • PLACE the last oval on top; adjust all the layers so they stack as evenly as possible;
        • SPREAD chocolate mousse all over the top and sides;
        • BREAK UP the meringue strips into finger-size pieces and press them into the chocolate mousse, top and sides (see picture, above);
        • SIFT icing sugar on the top;
        • REFRIGERATE for at least one hour. The cake is better the next day and it keeps very well for at least 48 hours, in the refrigerator.
        An amazing thing about this recipe is that it contains no flour,  no cream, very little butter, yet it feels extremely rich. And it's very economical.

        Don't wait for a special occasion to try it!

        CLICK HERE TO PRINT THE RECIPE  (PDF DOCUMENT)

        Ratatouille Recipes And All About Ratatouille


        DID I TELL YOU that I live in a village that has only 1500 inhabitants? If this were France, or Spain, or Italy, that wouldn't be a problem. But this is Eastern Canada and the eating habits of the locals are very conservative.

        Even the nearest city – Fredericton – is a big disappointment in the gourmet ingredient category.

        Therefore, when I see something fresh at one of the local supermarkets, I grab it.

        This week, it was zucchini AND sweet peppers. I got two nice green, fat, fresh courgettes and a package of six mixed sweet peppers. My mouth watered and my tastebuds yelled, "ratatouille"! (I know, it's supposed to have eggplant as well, but why be greedy?)

        Which brings us back to Julia Child. I had had ratatouille in France – and frankly the quality was uneven – but it was in Mastering the Art of French Cooking that I learned the true secret of good ratatouille: all the ingredients must be cooked separately, so that they will remain recognizable. Mushy is not an option!

        Ah, but, what IS ratatouille? Where does it come from?

        RATATOUILLE HISTORY

        What could be more evocative of the splendors of mediterranean cuisine than ratatouille? Ratatouille is a vegetable stew (tomatoes, eggplant, zucchini, peppers), sautéed separately or together in olive oil. One adds garlic, olives (ratatouille niçoise), sometimes onions as in Languedoc. The dish has spread all around the Mediterranean. And so the sicilian caponata [...] includes mushrooms, olives and a stalk of celery, the whole deglazed with a splash of vinegar.

        At its origin, in 1778, the word first designated a coarse stew, a coarse mixture. At the end of the 19th century, in military slang, the abbreviation "rata" designated a mixture of beans and potatoes, and, later, a mixture of vegetables and meat. It was only during the 20th century that the word
        ratatouille acquired the meaning that we give it today.

        The name is recent, the dish ancient, but what is it all about? It is amusing to look at its elements one by one and to determine their origin [...] which leads us to conclude that the dish could not have been invented before the 16th century, and probably during the 18th century.


        (Translated and abridged from La ratatouille ou les avatars de la mondialisation des légumes [www.canalacademie.com].)

        TRADITIONAL RATATOUILLE INGREDIENTS
        • Olive oil
        • Onions
        • Garlic
        • Green and red sweet peppers
        • Zucchini squash (courgettes)
        • Eggplant (aubergines)
        • Tomatoes
        • Black olives
        • Basil, thyme, rosemary or herbes de Provence
        • Salt
        • Pepper
        Non-traditional but favourite additions of mine:
        • Green beans
        • Mushrooms
        THE JULIA CHILD RATATOUILLE RECIPE

        Click on the first link for a PDF document of Julia Child's ratatouille recipe from Mastering the Art of French Cooking.


        GINA'S WINTER RATATOUILLE

        Ratatouille is really a summer recipe – for us here it would be at the end of the summer, when the eggplant and the tomatoes are at their best. This is a winter recipe, hence the canned tomatoes.

        • 1 lb. (500 g) zucchini (courgettes)
        • 2 green peppers
        • 2 red peppers
        • 1/2 lb (250 g) green beans (optional)
        • 12 medium mushrooms
        • 1 large white onion
        • 2 cloves of garlic
        • 1 28-oz (796 ml) can of whole Italian-style tomatoes
        • 1/4 cup of chopped parsley
        • A sprinkling of thyme
        • Salt and pepper
        • Olive oil
        COOKING RATATOUILLE
        • Cut the zucchini into 1/2-inch slices (and the eggplant, if you're using them), in nice 1-inch by 1/2-inch chunks.
        • Place them in a bowl and sprinkle with 1 or 2 tsp of salt, mix with the hands.
        • Set aside and allow to sweat for about half an hour.
        • Drain and dry well.
        • Heat some oil in a large frying pan and brown the zucchini (and eggplant) pieces lightly on both sides; transfer to a bowl.
        • Cut the peppers into 1/2-inch strips and sauté in the same oil; transfer to the same bowl as the zucchini/eggplant.
        • Slice the onions and cook in the oil until just beginning to brown; add the mushrooms and sauté them a bit, then add the garlic, the thyme, the parsley and sprinkle with salt and pepper.
        • Cook the (optional) green beans in plenty of salted boiling water until they're still slightly al dente. Transfer to a large bowl of ice water to stop the cooking.
        • Transfer all the vegetables, in layers, to a covered casserole.
        • Drain the tomatoes to remove the liquid; chop them coarsely and pour them over the vegetables in the casserole.
        • Cover and cook for 15 minutes, checking from time to time to keep the vegetables from scorching on the the bottom; adjust the heat if necessary.
        • Continue cooking, or not, depending on how you wish to serve your ratatouille.
        SERVING RATATOUILLE

        AS SAUCE FOR PASTA: Ratatouille makes a very good vegetarian sauce for pasta; in fact, that's what I made this batch for. It's great with parmesan cheese! I like it fairly runny for this purpose.

        BAKED RATATOUILLE CASSEROLE: Top with mozzarella, parmesan, breadcrumbs, whatever you like; bake in the oven till the cheese begins to bubble and brown.

        RATATOUILLE TART: Continue cooking on fairly high heat to evaporate most of the liquid, or strain the liquid out. Let cool and spoon into a tart shell. Top with mozzarella, parmesan, anchovies, olives, whatever strikes your fancy. Bake.

        AS A QUICHE: Use a runny ratatouille and cool it first. Fill a partially cooked tart shell with the vegetables, pour over them a mixture of 3 eggs and 1-1/2 to 2 cups of cream (just to cover the vegetables; don't overfill); top with parmesan cheese. Bake at 375 degrees F (190 degrees C) for 25 to 30 minutes.

        AS A PIZZA TOPPING: Continue cooking on fairly high heat to evaporate ALL the liquid, or strain the liquid out. Spread on top of pizza dough, add mozzarella cheese, and bake according to your usual pizza recipe.

        AS A TOPPING FOR BRUSCHETTA: Raise heat until all liquid has evaporated (stir often to prevent burning) -- or strain the liquid out; grill a thick slice of French bread, or ciabatta, brush with olive oil and add ratatouille.

        AS A VEGETABLE: Goes great with lamb, chicken, beef – almost any meat that is simply grilled or or barbecued.

        AS A COLD SIDE DISH/FIRST COURSE: Don't forget that ratatouille is just as good cold as hot, and, like most stews, it's better the next day.

        COOKING RATATOUILLE IN THE SLOW COOKER

        I've seen instructions for cooking ratatouille in a crockpot, but what's the point? By the time you've finished sautéeing all the separate ingredients, your ratatouille is about 15 minutes short of being ready to eat!

        Reserve your slow cooker for dishes that benefit from a long, slow sojourn at a low heat.

        EASY RATATOUILLE

        Of all the ratatouille recipes in my files, the simplest one I've seen is the one in my vintage Larousse Gastronomique:

        Peel and slice 6 aubergines and 6 Italian marrows (courgettes), sprinkle with salt and leave covered with a weighted plate for 1 hour. Slice 2 large onions, skin, remove pips and cut up 8 tomatoes. Slice 2 peppers very thinly, removing core and seeds. Chop 3 garlic cloves.

        Heat 1 cup olive oil in a heavy pan, fry onion until slightly coloured, add the garlic. Cook for 5 minutes, then add aubergines, courgettes, peppers and tomatoes. Season with salt and pepper, add a bouquet garni and cook, covered, for an hour. This dish may be served hot or cold.

        So much for cooking everything separately!

        So, which is the best ratatouille recipe? Yours, of course!

        NOTE: This French website has very good step-by-step directions for the preparation of ratatouille and you don't need to know French to appreciate the photos.


        Sunday

        Recipe for Fresh Pasta (Homemade Noodles)


        THESE ARE THE NOODLES that I made to accompany the boeuf bourguignon earlier this week. This is my own recipe: as far as I know, Julia Child never gave a recipe for fresh pasta or homemade noodles.

        THIS RECIPE requires a pasta maker.
        • 1    cup Durum semolina (see Tips and Techniques, below)
        • 1    cup all-purpose flour (or another cup of semolina and additional liquid)
        • 3    whole eggs, beaten lightly  
        • 1    TB olive oil
        •        pinch of salt
        •        a spoonful or two of water, if necessary
        MIX the dry ingredients, make a well in the centre and pour in the eggs and the oil. Mix with the fingers until everything is combined, adding drops of water if necessary to make a firm but cohesive dough. Doughs made with semolina require more liquid than those made with durum flour or regular flour.

        TURN the dough onto a counter and knead for about 10 minutes, until smooth and silky.  Semolina dough is rather stiff.

        NOTE: You will learn the feel by experience: luckily, if your first sheet doesn't turn out you can re-mix the batch, adding a drop more water if it's too dry and breakable or a spoonful more flour if it's too wet and sticky, and letting it rest again. It's not like pie dough: you can't ruin it by handling it!

        DIVIDE the dough into 8 equal parts, flatten them a bit, put them on a floured tray and cover them with plastic while they rest, for about half an hour. (This will relax the gluten.)

        INSTALL the pasta machine and follow its directions for sheeting and cutting the pasta. (I put it through No. 1 seven times, through 2 to 5 just once; I leave it at No. 5 for cutting into fettucine.)

        Let the sheets dry a bit on a floured cloth before putting them through the cutter; they will stick less that way. If the room is too warm, cool the dough before cutting it.

        Coat the noodles with lots of flour or corn starch to prevent them from sticking. Shake off the excess before plunging into boiling water.

        (You don't have to make noodles with the whole batch. Lasagna and ravioli are just two of the other dishes you can make with your own fresh pasta.)

        COOKING THE PASTA. Even though many recipes say that fresh pasta only requires seconds to cook, I find that it needs the same amount of time as regular pasta from the store – i.e., about 15 minutes. I'm probably doing something wrong, but I've been doing the same wrong thing with the same great results for about thirty years!

        Molto Italiano: 327 Simple Italian Recipes to Cook at HomeGET THIS BOOKif you're serious about fresh pasta and noodles – and other authentic Italian home cooking. The fresh pasta chapter has 34 recipes!

        Molto Italiano: 327 Simple Italian Recipes to Cook at Home (by Mario Batali) is one of my favourites cookbooks of all time – and if you go by the customer reviews, I'm not the only fan.


        TIPS AND TECHNIQUES

        DURUM SEMOLINA. Durum semolina (and Durum flour) come from a special variety of high-protein wheat by that name; it's mostly grown in Canada. Durum flour is just finely ground semolina.

        I use Durum semolina for all my pastas. They taste better and don't fall apart. 

        I buy it at the bulk store, but it's usually available at health food stores and gourmet grocery stores.

        I prefer the semolina over the flour because it keeps a little longer, but basically they're interchangeable. Both are sometimes called for in other Italian recipes, such as pizza and bread. Once you start stocking it you'll be looking for other ways of using it because you will love the distinct flavour it imparts!

        In Italy, all pastas are made from 100% Durum semolina – just read any imported pasta label.

        Semolina is more expensive than regular wheat flour: I have found that adding all-purpose flour in the proportion indicated in this recipe retains the quality while keeping down the cost.

        If you use Durum flour instead of semolina, you may need to adjust the liquid.

        Durum semolina and Durum flour should be kept in the refrigerator, as they tend to go rancid otherwise.

        Saturday

        I Test Boeuf Bourguignon In The Slow Cooker And With Noodles

        *** SEE UPDATE HERE ***

        GOOGLE HAS MORE THAN 50 PAGES on the subject of boeuf bourguignon and 40-plus on "beef bourguignon", prepared in the slow cooker (a.k.a. crockpot/crock pot), so I concluded there must be some demand out there for simplifying the preparation of that dish.

        I don't know about you, but I don't find it easier to cook with a slow cooker, and that's why I  hardly ever use it even though I've had one for years. My experience with it is limited to the cooking of dried beans, chick peas, whole yellow peas, and chicken stock. I like the way the beans and peas get really soft without falling apart.

        So I went hunting for a beef bourguignon slow cooker recipe, limiting my search to a couple of reliable websites. Actually, all I wanted was a cooking time. I already had a very good beef bourguignon recipe for conventional cooking methods.


        I used pretty well the same ingredients and recipe as the first one I gave here, with these differences:
        • I used my own salt pork for the lardoons, instead of bacon like the last time;
        • I added a few chopped tomatoes, which I had omitted last time (adds depth to the flavour);
        • The wine I used was Beaujolais Nouveau, instead of Pinot Noir (not a great idea);
        • There was more sauce, so I had to double the amount of beurre manié to thicken the sauce;
        • I served it with buttered noodles, instead of herbed potatoes. Next day I had it with rice – the noodles are definitely a better fit.
        Both recipes gave the cooking time as 8 to 10 hours, so I figured that was the correct time.

        How did it turn out?

        So-so. I didn't like the texture of the meat; I guess it was overcooked because it was too dry. I didn't like the taste of the sauce either. It wasn't "my" boeuf bourguignon.

        I'm not giving up though. I know folks are wanting to use their slow cooker for this dish, and rightfully so – so I'm going to start hunting for a way of making a perfect beef bourguignon in the slow cooker.

        UPDATE: I kept my promise! Click here to see the excellent recipe I found.


        Hmm.. a bit blurry... next time I'll use a tripod!


        What did turn out great, though, was Julia Child's suggestion of serving boeuf bourguignon with buttered noodles instead of potatoes.

        That rather complicated the recipe for me, because there's no place around here to buy fresh pasta, so I had to make the noodles from scratch.

        I wasn't going to give you the recipe, I was just going to say, "Buy or make some fresh pasta", but then I remembered trying a new recipe once, from a website that I thought I could trust, and it was just awful.

        Come back tomorrow for the recipe, or sign up for the email updates and you'll get it right in your inbox.


        TIPS AND TECHNIQUES


        Lardons. This is what lardons (or "lardoons") look like. You start with salt pork belly, which you slice then cut into little sticks. Simmer in water for a few minutes to get rid of the excess salt, then fry in their own fat till golden and crisp.

        They're better than potato chips – and just as hard to resist!


        Beurre manié. I mentioned in another post that beurre manié was easier to mix on a plate. Well, it is. 

        This is what it should look like after you have mixed the butter and flour into a paste with a fork.